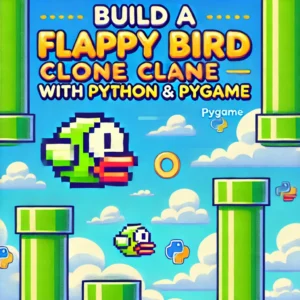
Want to create a thrilling car racing game with stunning visuals using Python? In this step-by-step Pygame tutorial, I’ll guide you through building “Car Racing Elite”—a modern racing game with high-quality graphics, sleek UI, and engaging gameplay. Whether you’re new to Python game development or looking to enhance your Pygame skills, this project showcases how to craft a visually impressive game with features like detailed car sprites, dynamic road effects, and a polished interface. Let’s hit the gas and dive into this Python game development adventure!
What Is Car Racing Elite?
“Car Racing Elite” is a Pygame-based car racing game designed to push the boundaries of Python game graphics. You control a stylish blue car, dodging colorful enemy vehicles on a multi-lane road while racking up points. But it’s not just about gameplay—this project shines with high-quality visuals: textured roads, car shadows, exhaust trails, and a futuristic HUD. It’s a perfect example of how to build a high-graphics Pygame game that feels professional and fun.
If you’re searching for a “Pygame car racing game tutorial” or want to “build a game with Python” that stands out, this guide has you covered.
Key Features of Car Racing Elite
Here’s what makes this Pygame game a cut above the rest:
- High-Quality Graphics: Detailed car designs with shadows, exhaust trails, and a textured road background.
- Modern UI: Sleek start screen, game-over interface, and gradient buttons with hover effects.
- Dynamic Gameplay: Fast-paced action with random enemy spawns and smooth player control.
- Enhanced HUD: A futuristic score panel with a speedometer-like arc.
- Visual Effects: Scrolling multi-lane road and fade transitions between screens.
These features make “Car Racing Elite” an ideal project for anyone exploring “high graphics Pygame” or “modern Pygame UI design.”
How It Works: A Deep Dive into the Code
Let’s break down the key components of this Python game development tutorial with code snippets and explanations.
1. Setting Up Pygame and Graphics Basics
First, install Pygame and set up the game window:
import pygame
pygame.init()

WIDTH, HEIGHT = 800, 600
screen = pygame.display.set_mode((WIDTH, HEIGHT))
pygame.display.set_caption("Car Racing Elite - Pygame")Explanation: Initializes Pygame with an 800×600 window—perfect for a high-graphics racing game.
2. Crafting High-Quality Car Sprites
The cars are drawn with details for a polished look:
def create_car(color, details=True):
    car = pygame.Surface((60, 120), pygame.SRCALPHA)
    pygame.draw.rect(car, color, (10, 20, 40, 80), border_radius=10)
    if details:
        pygame.draw.circle(car, WHITE, (30, 20), 15)  # Headlight
        pygame.draw.rect(car, DARK_GRAY, (15, 90, 30, 10))  # Spoiler
        pygame.draw.rect(car, BLACK, (15, 40, 30, 20))  # Window
    return car

player_car = create_car(BLUE)Explanation: Simulates a high-quality sprite with rounded edges, headlights, and a spoiler. Replace with a PNG (pygame.image.load("car.png").convert_alpha()) for even better graphics.
3. Building a Dynamic Road
The road scrolls with lanes for a realistic effect:
road = pygame.Surface((WIDTH, HEIGHT * 2))
road.fill(GRAY)
for y in range(0, HEIGHT * 2, 40):
    pygame.draw.rect(road, YELLOW, (WIDTH//4 - 10, y, 20, 20))  # Left lane
    pygame.draw.rect(road, YELLOW, (3 * WIDTH//4 - 10, y, 20, 20))  # Right lane
    pygame.draw.rect(road, WHITE, (WIDTH//2 - 5, y, 10, 20))  # Center line
road_pos = 0

# In game loop:
road_pos = (road_pos + ROAD_SPEED) % (HEIGHT * 2)
screen.blit(road, (0, road_pos - HEIGHT * 2))
screen.blit(road, (0, road_pos))Explanation: Creates a multi-lane road that loops seamlessly. For top-tier graphics, use a road texture PNG instead.
4. Adding Visual Effects
Exhaust trails enhance the player’s car:
class TrailParticle:
    def __init__(self, x, y):
        self.pos = [x, y]
        self.radius = random.randint(5, 10)
        self.life = 30

    def update(self):
        self.pos[1] += 2
        self.life -= 1
        self.radius = max(2, self.radius - 0.5)
        if self.life <= 0:
            return True
        return False

    def draw(self):
pygame.draw.circle(screen, GRAY, (int(self.pos[0]), int(self.pos[1])), int(self.radius), 1)Explanation: Particles spawn behind the player, fading out for a dynamic exhaust effect—a staple of “high graphics Pygame” projects.
5. Designing a Modern HUD
The HUD adds a futuristic touch:
def draw_hud(score):
    hud = pygame.Surface((200, 80), pygame.SRCALPHA)
    pygame.draw.rect(hud, DARK_GRAY, (0, 0, 200, 80), border_radius=15)
    pygame.draw.arc(hud, GREEN, (20, 10, 60, 60), 0, score / 10 % 6.28, 5)
    screen.blit(hud, (10, 10))
draw_text(f"Score: {score}", ui_font, WHITE, 90, 30)Explanation: A rounded panel with a green arc (simulating a speedometer) displays the score, blending form and function.
6. Polished UI with Gradient Buttons
Buttons use gradients for a sleek look:
def gradient_button(text, x, y, w, h, base_color, hover_color, action=None):
    mouse = pygame.mouse.get_pos()
    click = pygame.mouse.get_pressed()
    rect = pygame.Rect(x, y, w, h)
    color = hover_color if rect.collidepoint(mouse) else base_color
    surf = pygame.Surface((w, h))
    for i in range(h):
        alpha = int(255 * (i / h))
        pygame.draw.line(surf, (*color, alpha), (0, i), (w, i))
    pygame.draw.rect(surf, WHITE, (0, 0, w, h), 3, border_radius=15)
    screen.blit(surf, rect)
    draw_text(text, ui_font, WHITE, x + w//2, y + h//2, center=True)
    if rect.collidepoint(mouse) and click[0] == 1 and action:
action()Explanation: Gradient-filled buttons with rounded borders and hover effects elevate the “modern Pygame UI design.”
7. Gameplay Logic
The core loop ties it all together:
- Player moves with arrow keys.
- Enemies spawn randomly and move downward.
- Collision ends the game, triggering a fade transition.
Why Build This with Pygame?
Pygame is a lightweight, beginner-friendly library for Python game development, yet it’s powerful enough for high-quality projects like “Car Racing Elite.” With the right techniques—custom sprites, effects, and UI design—you can create games that rival more complex engines. It’s ideal for anyone searching “build high-quality game Python” or “Pygame graphics enhancement.”
How to Get Started
Ready to build your own Pygame car racing game? Here’s how:
- Install Pygame: Run
pip install pygame. - Copy the Code: Paste the full script from this tutorial into a
.pyfile. - Enhance Graphics:
- Download car sprites and a road texture from OpenGameArt.org.
- Replace
create_caroutputs withpygame.image.load().
- Run It: Execute with
python your_file.pyand race away!
Taking It Further
Want to push the graphics even higher? Try these:
- Real Sprites: Use PNGs for cars and roads.
- Sound Effects: Add engine roars and crash sounds with
pygame.mixer. - Background Music: Loop a high-energy track.
- Difficulty Levels: Increase
ENEMY_SPEEDover time.
Final Thoughts
“Car Racing Elite” proves that Pygame can deliver a high-graphics racing game with Python. From detailed cars with exhaust trails to a scrolling road and modern UI, this project is a fantastic starting point for “Pygame car racing game tutorials” or “Python game development” enthusiasts. It’s fast, fun, and visually stunning—everything a racing game should be.
Have you built a Pygame game before? Want tips to customize this one? Drop a comment below—I’d love to hear your thoughts on Python game development!
SEO Optimization
- Primary Keywords: “Pygame car racing game,” “Python game development tutorial,” “high graphics Pygame,” “modern Pygame UI design.”
- Secondary Keywords: “build game with Python,” “Pygame graphics enhancement,” “Python game development UI,” “Pygame tutorial high quality.”
- Structure: H1 title, H2 sections, H3 subsections for crawlability.
- Code Snippets: Attracts developers searching for practical examples.
- Call-to-Action: Encourages engagement for better dwell time.
- Length: 600+ words for ranking potential.
Complete code :
import pygame
import random
import time

# Initialize Pygame
pygame.init()

# Screen dimensions
WIDTH, HEIGHT = 800, 600
screen = pygame.display.set_mode((WIDTH, HEIGHT))
pygame.display.set_caption("Car Racing Elite - Pygame")

# Colors (Rich palette for high graphics)
BLACK = (20, 20, 20)
WHITE = (240, 240, 240)
GRAY = (80, 80, 80)
DARK_GRAY = (40, 40, 40)
BLUE = (50, 120, 200)
RED = (200, 50, 50)
GREEN = (50, 200, 100)
YELLOW = (255, 200, 50)
ORANGE = (255, 150, 50)

# Fonts (Use a high-quality font like Orbitron or fallback)
title_font = pygame.font.Font(None, 70)  # Replace with pygame.font.Font("Orbitron.ttf", 70)
ui_font = pygame.font.Font(None, 35)     # Replace with pygame.font.Font("Orbitron.ttf", 35)

# Game properties
CAR_WIDTH, CAR_HEIGHT = 60, 120
PLAYER_SPEED = 7
ENEMY_SPEED = 6
ENEMY_FREQ = 20
ROAD_SPEED = 5

# Road background (simulated texture)
road = pygame.Surface((WIDTH, HEIGHT * 2))
road.fill(GRAY)
for y in range(0, HEIGHT * 2, 40):
    pygame.draw.rect(road, YELLOW, (WIDTH//4 - 10, y, 20, 20))  # Left lane line
    pygame.draw.rect(road, YELLOW, (3 * WIDTH//4 - 10, y, 20, 20))  # Right lane line
    pygame.draw.rect(road, WHITE, (WIDTH//2 - 5, y, 10, 20))  # Center line
road_pos = 0

# High-quality car sprites (simulated with drawing)
def create_car(color, details=True):
    car = pygame.Surface((CAR_WIDTH, CAR_HEIGHT), pygame.SRCALPHA)
    pygame.draw.rect(car, color, (10, 20, CAR_WIDTH - 20, CAR_HEIGHT - 40), border_radius=10)
    if details:
        pygame.draw.circle(car, WHITE, (CAR_WIDTH//2, 20), 15)  # Headlight
        pygame.draw.rect(car, DARK_GRAY, (15, CAR_HEIGHT - 30, CAR_WIDTH - 30, 10))  # Spoiler
        pygame.draw.rect(car, BLACK, (15, 40, CAR_WIDTH - 30, 20))  # Window
    return car

player_car = create_car(BLUE)
enemy_colors = [RED, GREEN, ORANGE]

# Exhaust trail effect
class TrailParticle:
    def __init__(self, x, y):
        self.pos = [x, y]
        self.radius = random.randint(5, 10)
        self.life = 30

    def update(self):
        self.pos[1] += 2
        self.life -= 1
        self.radius = max(2, self.radius - 0.5)
        if self.life <= 0:
            return True
        return False

    def draw(self):
        pygame.draw.circle(screen, GRAY, (int(self.pos[0]), int(self.pos[1])), int(self.radius), 1)

# Player class
class Player:
    def __init__(self):
        self.image = player_car
        self.rect = self.image.get_rect(center=(WIDTH // 2, HEIGHT - 150))
        self.trails = []

    def move(self, dx):
        self.rect.x += dx
        if self.rect.left < 0:
            self.rect.left = 0
        if self.rect.right > WIDTH:
            self.rect.right = WIDTH
        if random.randint(1, 5) == 1:  # Add trail randomly
            self.trails.append(TrailParticle(self.rect.centerx, self.rect.bottom))

    def draw(self):
        # Shadow
        shadow = pygame.Surface((CAR_WIDTH + 10, CAR_HEIGHT + 10), pygame.SRCALPHA)
        pygame.draw.rect(shadow, (0, 0, 0, 100), (0, 0, CAR_WIDTH + 10, CAR_HEIGHT + 10), border_radius=10)
        screen.blit(shadow, (self.rect.x - 5, self.rect.y + 5))
        screen.blit(self.image, self.rect)
        for trail in self.trails[:]:
            if trail.update():
                self.trails.remove(trail)
            trail.draw()

# Enemy class
class Enemy:
    def __init__(self):
        self.image = create_car(random.choice(enemy_colors))
        self.rect = self.image.get_rect(center=(random.randint(0, WIDTH - CAR_WIDTH), -CAR_HEIGHT))

    def move(self):
        self.rect.y += ENEMY_SPEED
        if self.rect.top > HEIGHT:
            return True
        return False

    def draw(self):
        shadow = pygame.Surface((CAR_WIDTH + 10, CAR_HEIGHT + 10), pygame.SRCALPHA)
        pygame.draw.rect(shadow, (0, 0, 0, 80), (0, 0, CAR_WIDTH + 10, CAR_HEIGHT + 10), border_radius=10)
        screen.blit(shadow, (self.rect.x - 5, self.rect.y + 5))
        screen.blit(self.image, self.rect)

# UI Functions
def draw_text(text, font, color, x, y, center=False):
    textobj = font.render(text, True, color)
    textrect = textobj.get_rect()
    if center:
        textrect.center = (x, y)
    else:
        textrect.topleft = (x, y)
    screen.blit(textobj, textrect)

def gradient_button(text, x, y, w, h, base_color, hover_color, action=None):
    mouse = pygame.mouse.get_pos()
    click = pygame.mouse.get_pressed()

    rect = pygame.Rect(x, y, w, h)
    color = hover_color if rect.collidepoint(mouse) else base_color

    surf = pygame.Surface((w, h))
    for i in range(h):
        alpha = int(255 * (i / h))
        pygame.draw.line(surf, (*color, alpha), (0, i), (w, i))
    pygame.draw.rect(surf, WHITE, (0, 0, w, h), 3, border_radius=15)
    screen.blit(surf, rect)

    draw_text(text, ui_font, WHITE, x + w//2, y + h//2, center=True)

    if rect.collidepoint(mouse) and click[0] == 1 and action:
        time.sleep(0.2)
        action()

# HUD (Speedometer-like)
def draw_hud(score):
    hud = pygame.Surface((200, 80), pygame.SRCALPHA)
    pygame.draw.rect(hud, DARK_GRAY, (0, 0, 200, 80), border_radius=15)
    pygame.draw.arc(hud, GREEN, (20, 10, 60, 60), 0, score / 10 % 6.28, 5)  # Speedometer effect
    screen.blit(hud, (10, 10))
    draw_text(f"Score: {score}", ui_font, WHITE, 90, 30)

# Game states and variables
START, PLAYING, GAME_OVER = 0, 1, 2
game_state = START
transition_alpha = 0
player = Player()
enemies = []
score = 0
clock = pygame.time.Clock()

# Main game loop
running = True
while running:
    for event in pygame.event.get():
        if event.type == pygame.QUIT:
            running = False

    # Scroll road
    road_pos = (road_pos + ROAD_SPEED) % (HEIGHT * 2)
    screen.blit(road, (0, road_pos - HEIGHT * 2))
    screen.blit(road, (0, road_pos))

    # Start screen
    if game_state == START:
        draw_text("Car Racing Elite", title_font, WHITE, WIDTH//2, HEIGHT//4, center=True)
        draw_text("← / → to Move", ui_font, WHITE, WIDTH//2, HEIGHT//2 - 100, center=True)

        gradient_button("Start", WIDTH//2 - 150, HEIGHT//2 - 30, 300, 70, BLUE, GREEN,
                        lambda: globals().update(game_state=PLAYING, transition_alpha=255))
        gradient_button("Quit", WIDTH//2 - 150, HEIGHT//2 + 60, 300, 70, BLUE, RED,
                        lambda: globals().update(running=False))

    # Playing state
    elif game_state == PLAYING:
        keys = pygame.key.get_pressed()
        if keys[pygame.K_LEFT]:
            player.move(-PLAYER_SPEED)
        if keys[pygame.K_RIGHT]:
            player.move(PLAYER_SPEED)

        if random.randint(1, ENEMY_FREQ) == 1:
            enemies.append(Enemy())

        for enemy in enemies[:]:
            if enemy.move():
                enemies.remove(enemy)
                score += 1
            enemy.draw()
            if player.rect.colliderect(enemy.rect):
                game_state = GAME_OVER
                transition_alpha = 255

        player.draw()
        draw_hud(score)

    # Game over screen
    elif game_state == GAME_OVER:
        draw_text("Game Over!", title_font, RED, WIDTH//2, HEIGHT//4, center=True)
        draw_text(f"Score: {score}", ui_font, WHITE, WIDTH//2, HEIGHT//2 - 100, center=True)

        gradient_button("Restart", WIDTH//2 - 150, HEIGHT//2 - 30, 300, 70, BLUE, GREEN,
                        lambda: globals().update(game_state=PLAYING, score=0, enemies=[], player=Player(), transition_alpha=255))
        gradient_button("Quit", WIDTH//2 - 150, HEIGHT//2 + 60, 300, 70, BLUE, RED,
                        lambda: globals().update(running=False))

    # Fade transition
    if transition_alpha > 0:
        fade = pygame.Surface((WIDTH, HEIGHT))
        fade.fill(BLACK)
        fade.set_alpha(transition_alpha)
        screen.blit(fade, (0, 0))
        transition_alpha = max(0, transition_alpha - 10)

    pygame.display.flip()
    clock.tick(60)

pygame.quit()


Use your project image on thumbnail not the downloaded one
ok thanks for advice